Painted Christmas Wreath Mason Jar Candle Holder
Paint a small mason jar green, leave a round window, add a holly wreath and drop in an LED tea light. Supply list and 11 steps with photos.
 By Hakan
Published
Project card
- Time
- 1 hour, plus drying
- Skill
- Beginner
- Cost
- About $10
- Jar
- Half pint (8 oz)
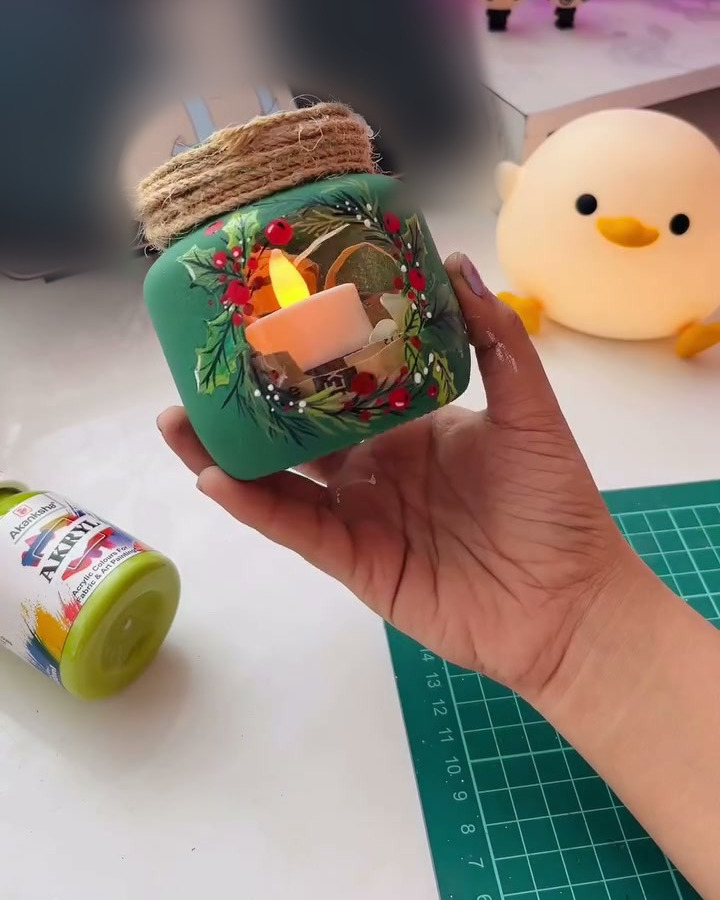
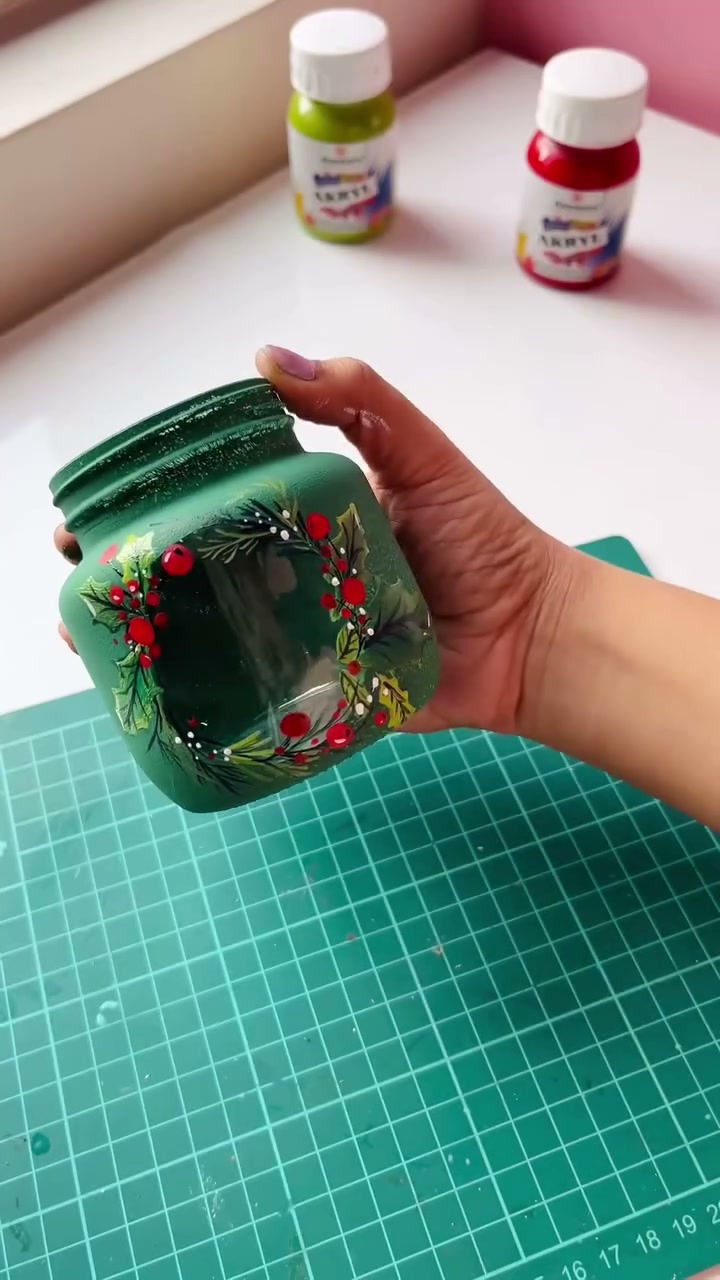
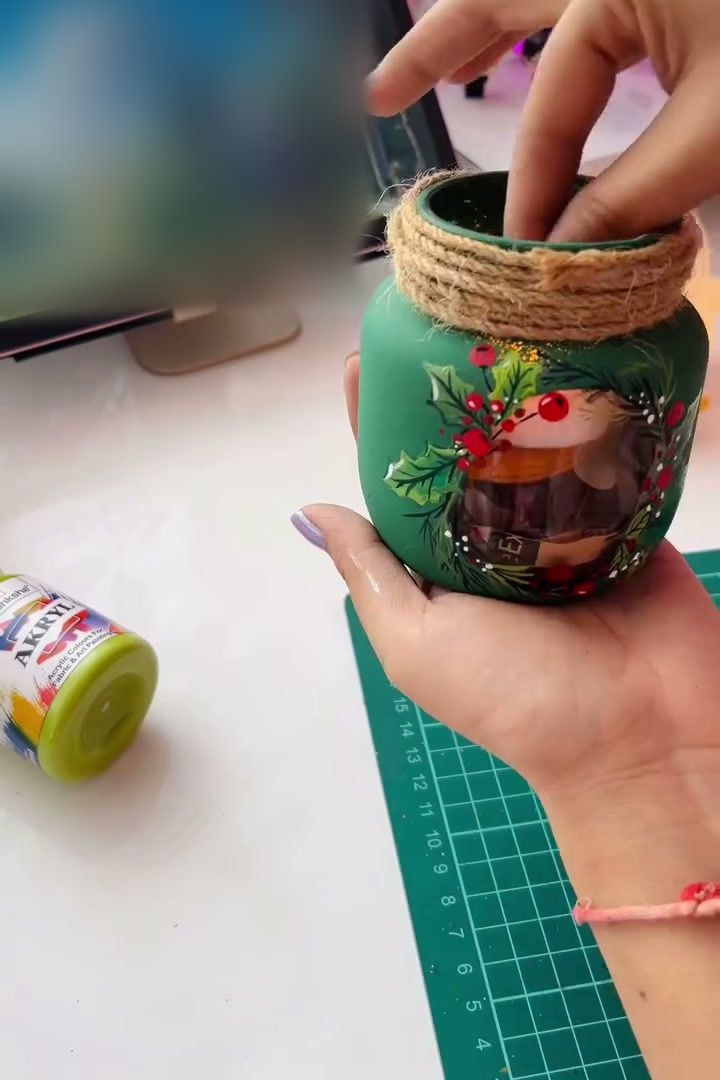
A small jar, a coat of green paint and one round patch of clear glass left in the middle. That patch is the whole trick: paint a holly wreath around it, put a flickering LED tea light inside, and the candle looks as if it is sitting in the middle of the wreath.
The clear window is not painted around by hand. A paper circle goes on the glass first, the paint goes over everything, and the circle comes off again. If you can cut out a circle, you can get a clean window.
What you need
- 1 small clear glass jar with smooth sides, about 8 oz (a half-pint mason jar or a squat jam jar)
- Scrap paper, a pencil, scissors and something round to trace, about 2.25 in (6 cm) across
- A glue stick, or a loop of tape, to hold the paper circle in place
- Dark green acrylic paint, matte, for the base coat
- A round foam pouncer (sponge dauber), or a piece of kitchen sponge
- Acrylic paint in light yellow-green, dark green, red and white
- A fine round brush, size 0 or 1
- A handful of shredded kraft paper or thin paper strips
- Jute twine, about 3 ft (1 m), and craft glue
- 1 flameless LED tea light
- Optional: one small faux flower for the filling
Two notes on that list. The jar needs at least one flat or gently curved side without raised lettering, because the paper circle has to sit flat. And the tea light has to be an LED one. The jar gets filled with paper.
Step 1: Cut a paper circle and stick it on the jar
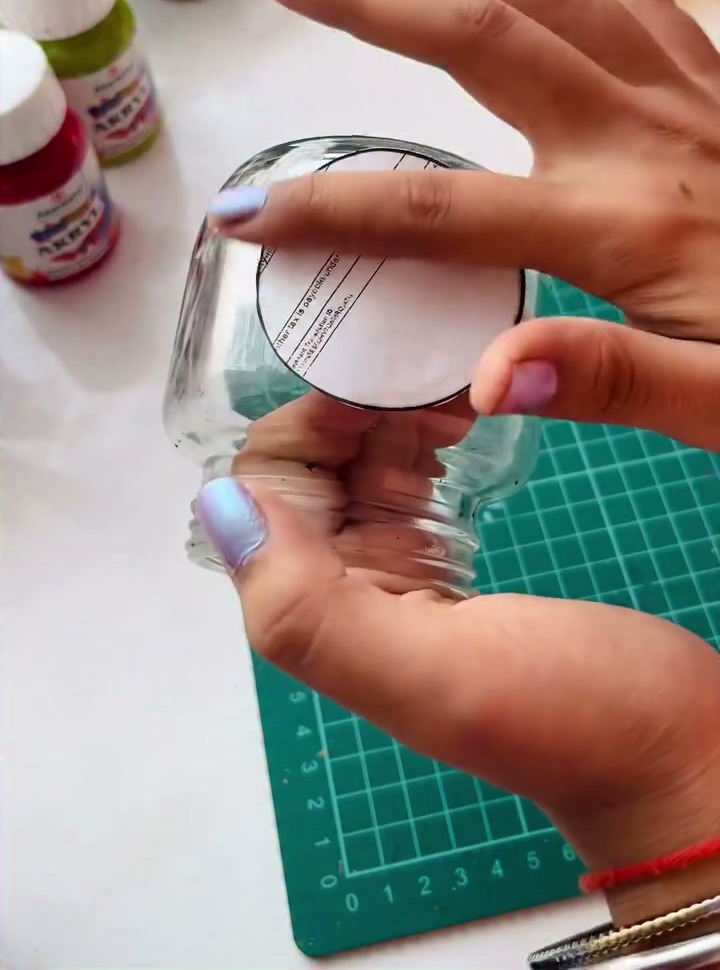
Trace a circle on scrap paper and cut it out. Any paper works, the back of an old receipt is fine. For an 8 oz jar, a circle about 2.25 in (6 cm) across leaves enough green around it for the wreath. Rub a little glue stick on the back and press the circle onto the middle of one side of the clean, dry jar. Smooth the edge down all the way round with a fingernail. Paint creeps under any part of the edge that is not stuck.
Step 2: Sponge on the green base coat
Dip the foam pouncer in dark green paint, tap off the extra on a plate, and dab it straight up and down all over the jar, the paper circle included. Do not brush or drag. Dabbing is what gives that even, slightly pebbled matte finish, and it hides the streaks a brush would leave on glass.
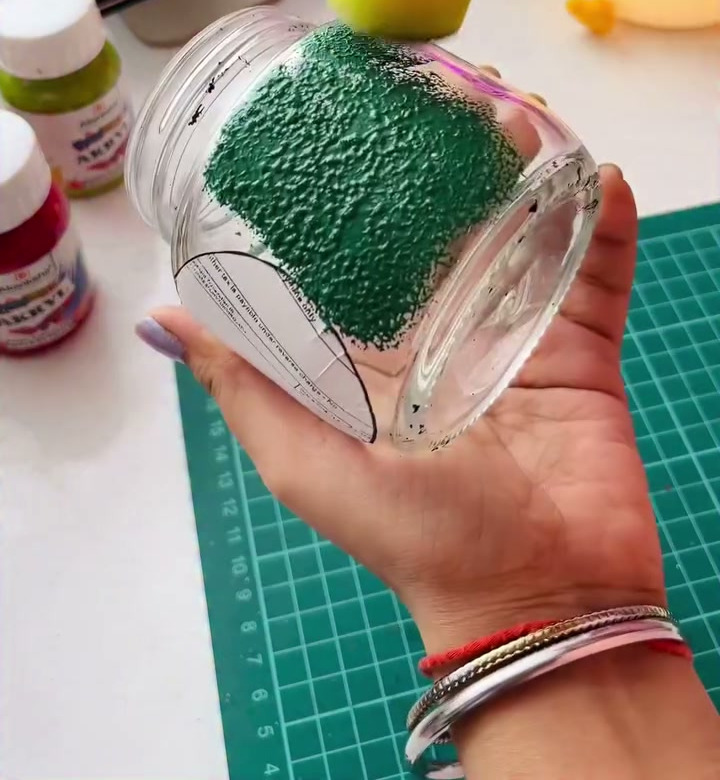
Cover the neck and the screw threads too. The first coat will look patchy and see-through. Give it about 20 minutes, then dab on a second coat. Two thin coats beat one thick one, which stays tacky and peels.
Step 3: Peel off the circle
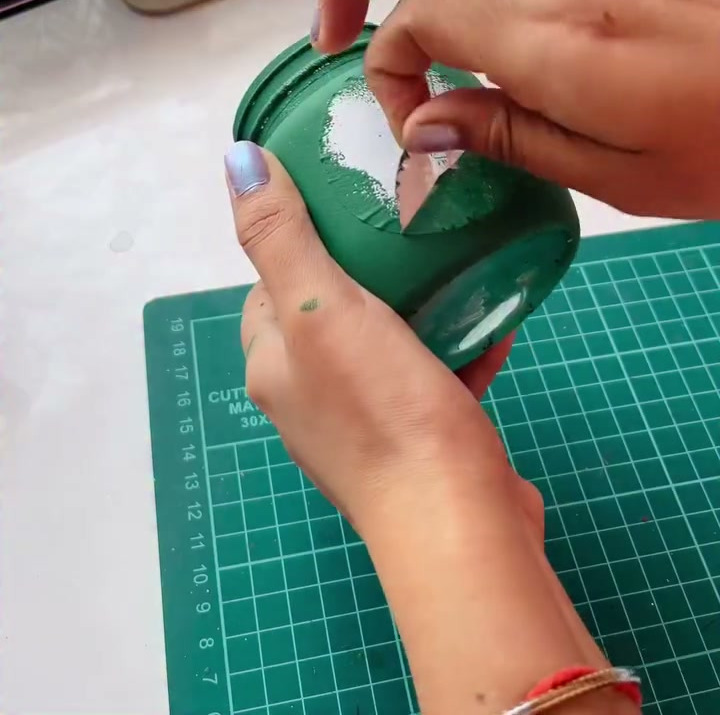
When the second coat is dry to the touch, lift the edge of the paper with a fingernail and peel it back slowly. You get a clean round window with a crisp painted edge. If a bit of glue is left on the glass, rub it off with a damp cotton swab.
Step 4: Paint the holly leaves in light green
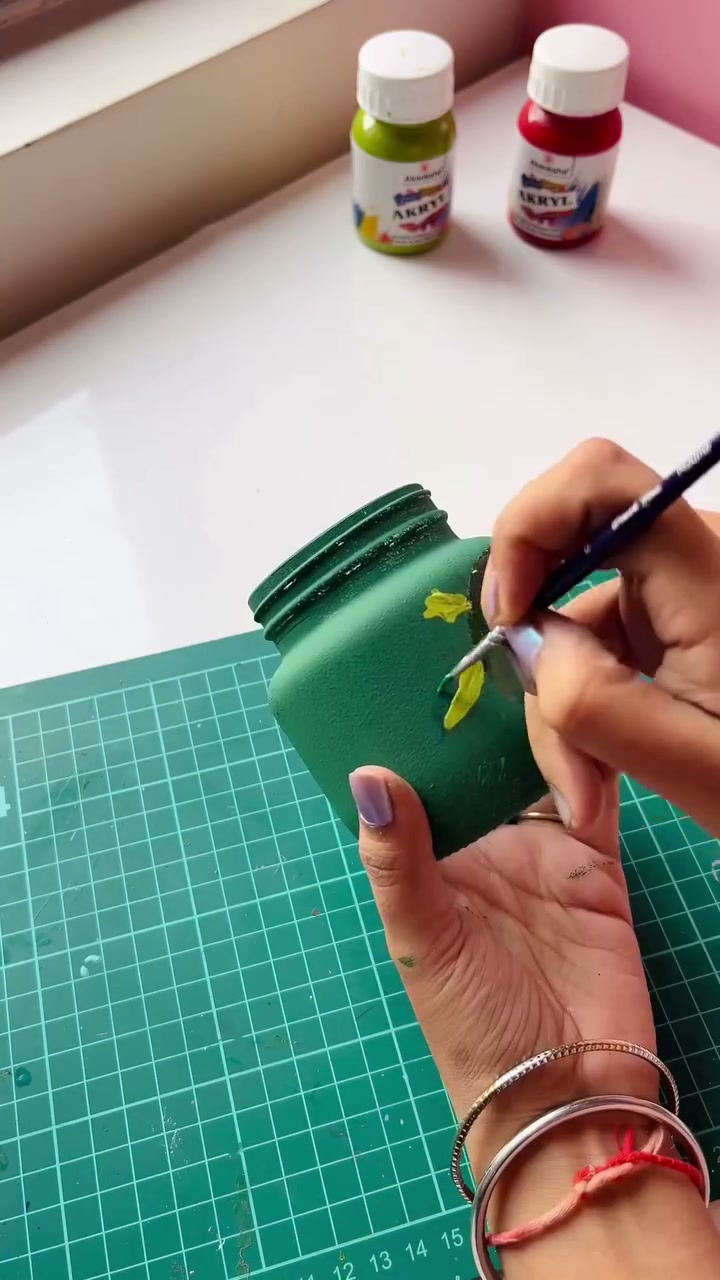
Load the fine brush with light yellow-green and paint small pointed leaves around the window. Each leaf is two or three short strokes that meet in a point. Put them in loose clusters of two or three, mostly at the bottom and the top of the circle, and leave gaps between the clusters. Let some leaves overlap the edge of the window a little. It hides any wobble in the painted edge.
Step 5: Add dark green outlines and pine sprigs
Once the leaves are dry, go back in with dark green. Give each leaf a centre vein and a spiky holly outline. The dark line over the pale leaf is what makes it read as holly and not as a green blob.
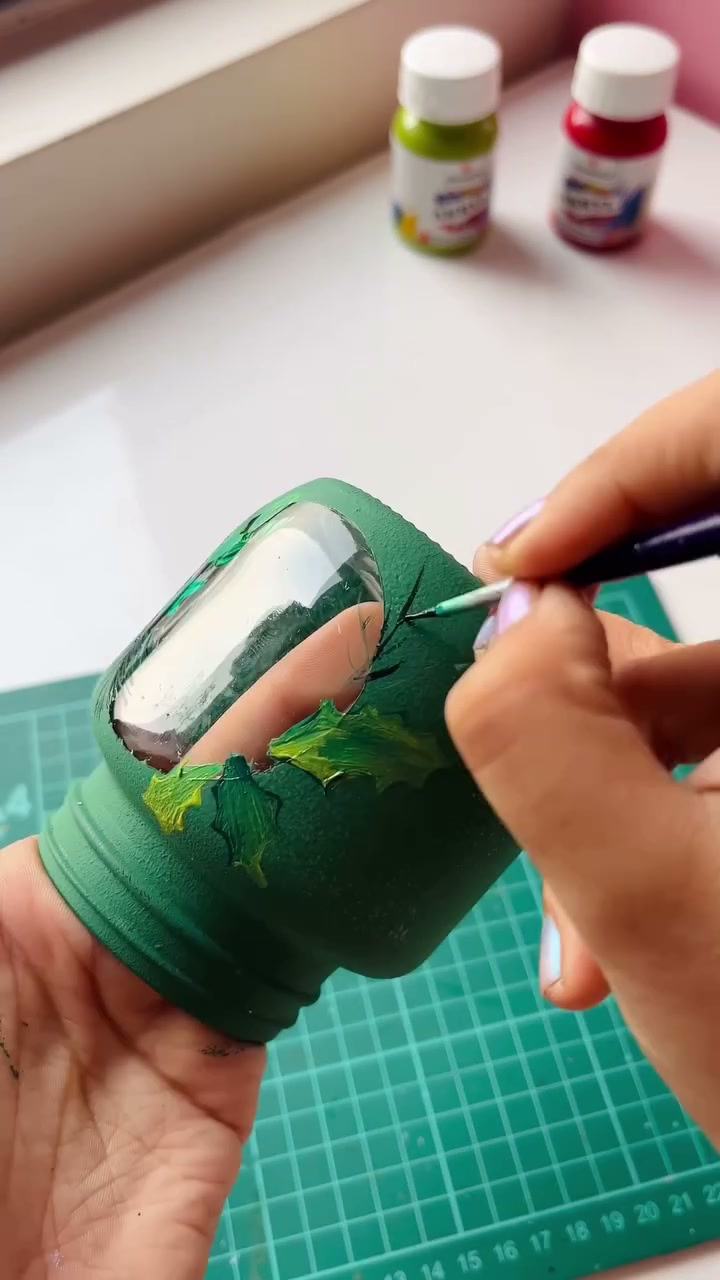
Fill the gaps between the clusters with pine sprigs: one thin curved line with short strokes flicking out from both sides. Follow the curve of the window so the sprigs join up into a ring.
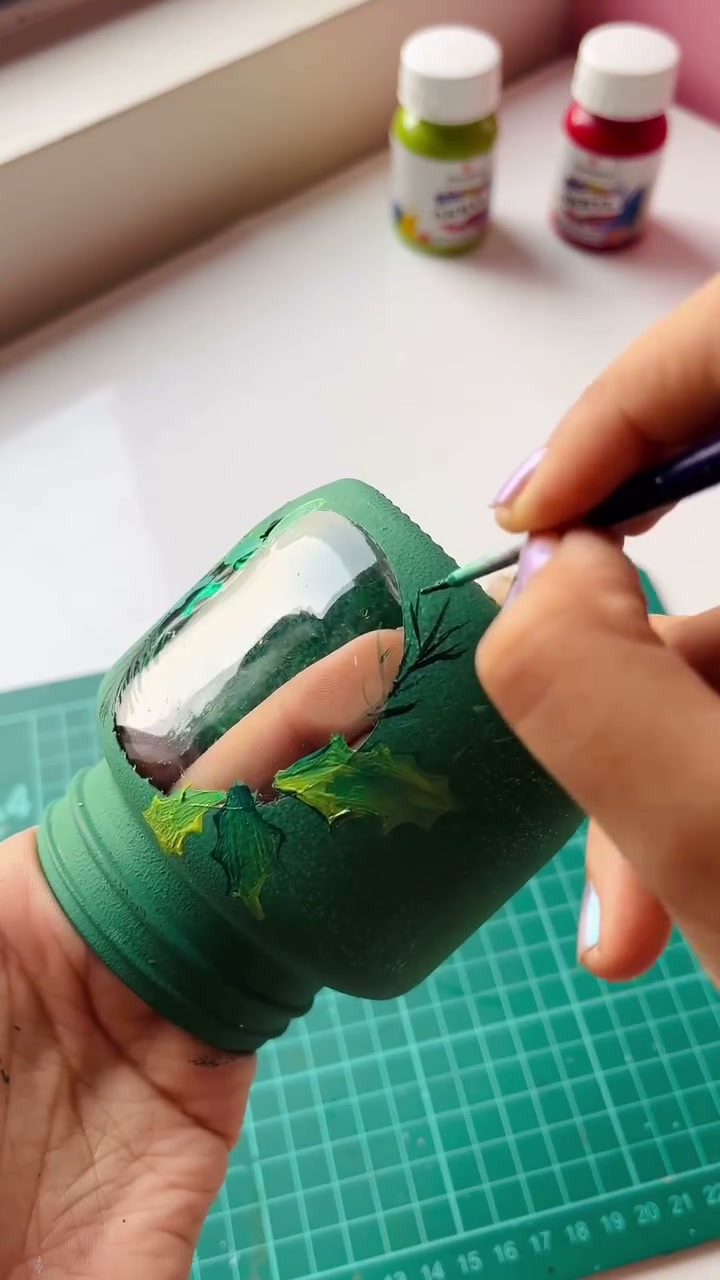
Step 6: Dot on the red berries
Pick up a bead of red paint on the tip of the brush and touch it to the jar without pressing. Group the berries in threes where the leaves meet, then scatter a few single ones along the sprigs. For rounder berries, use the handle end of the brush as a stamp.
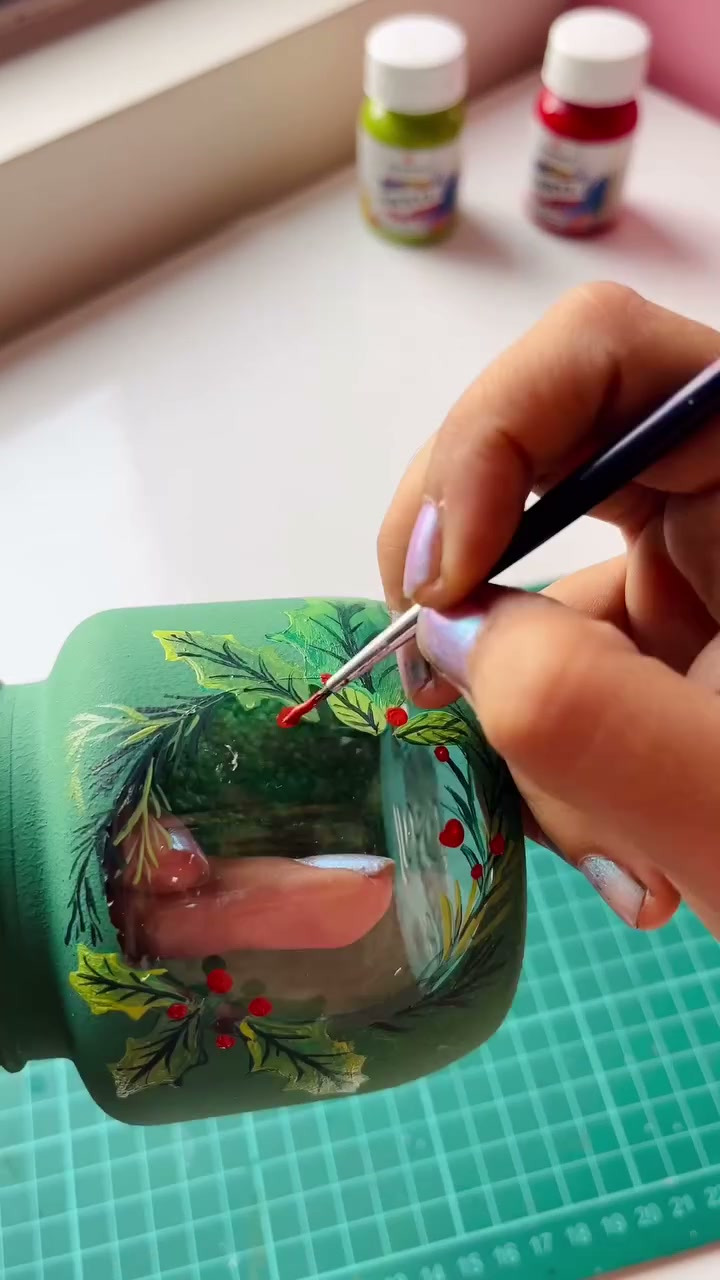
Step 7: Add white highlights and snow dots
Put one tiny white dot on the upper side of each berry. It takes ten seconds and it is the detail that makes them look round and shiny.
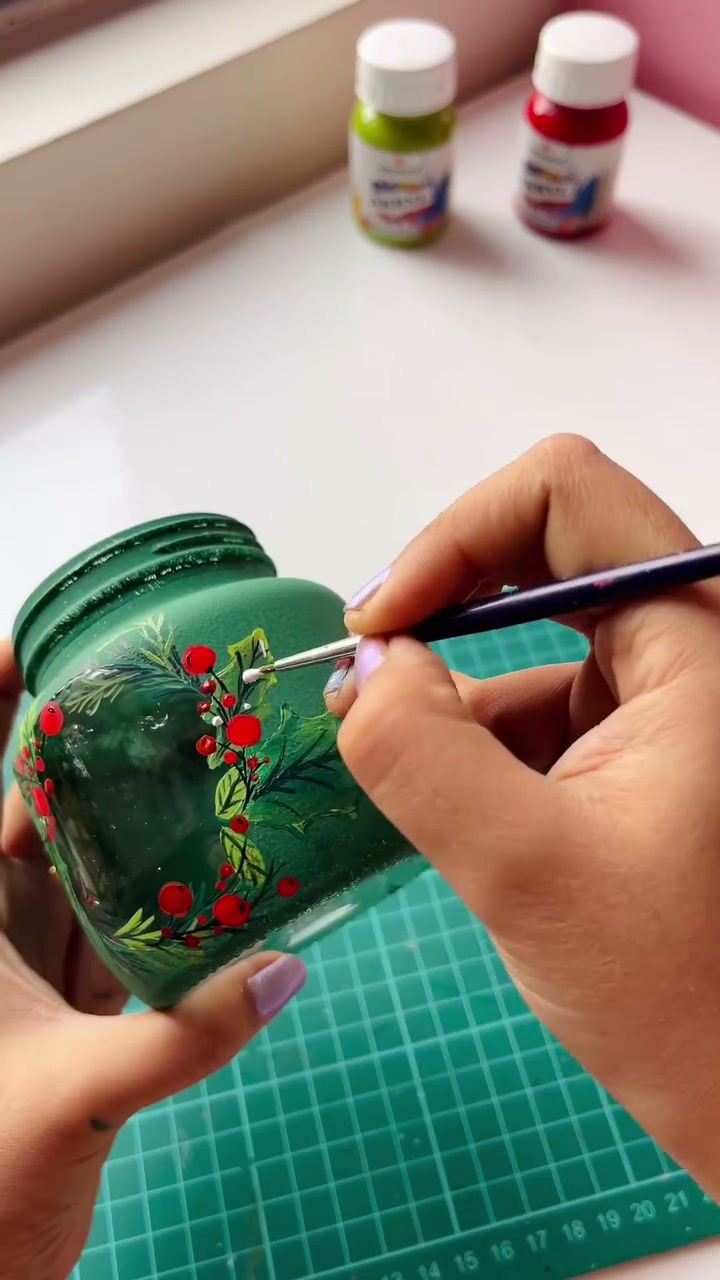
Then add a few rows of small white dots between the leaves, like snow or baby’s breath. Three or four dots in a line, getting smaller, look better than dots sprinkled everywhere.
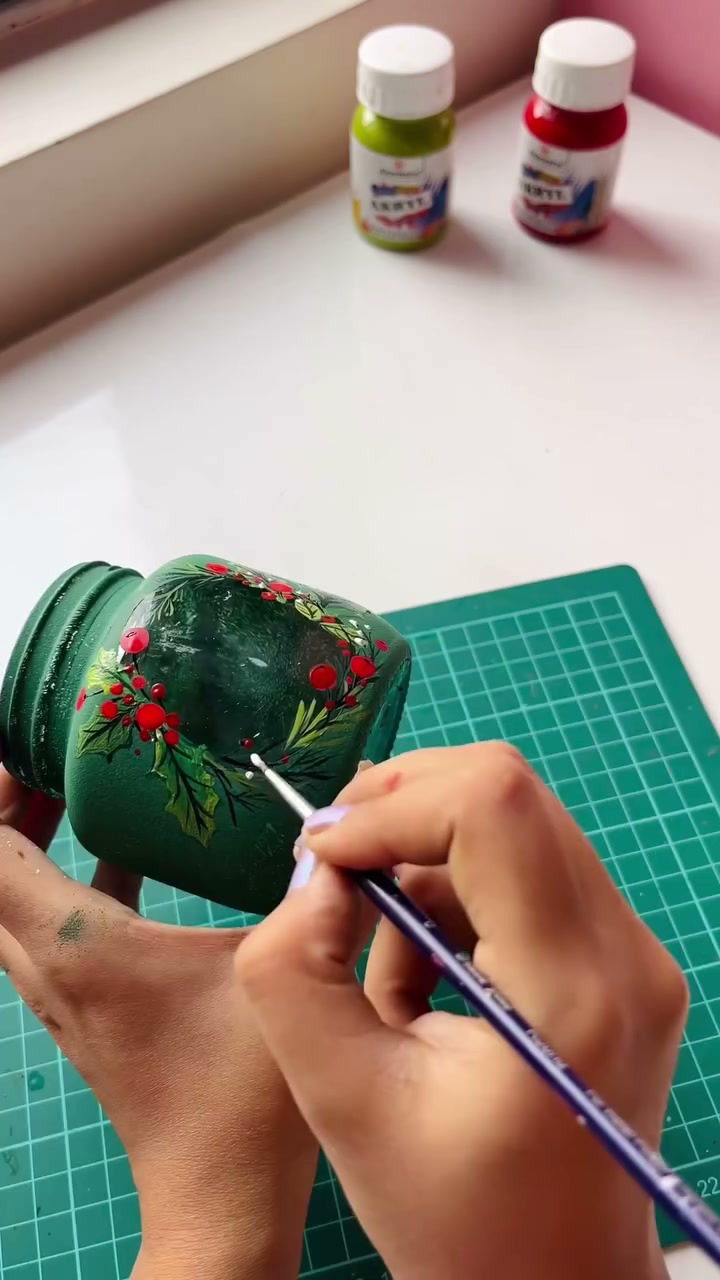
This is the wreath finished. Leave it to dry before you turn the jar over for the next step, or your palm will take the berries with it.
Step 8: Letter “Merry Christmas” on the back
Turn the jar round and write on the plain green side in white with the same fine brush. Thin the paint with a drop of water so it flows, and write a little larger than feels natural. Small letters fill in.
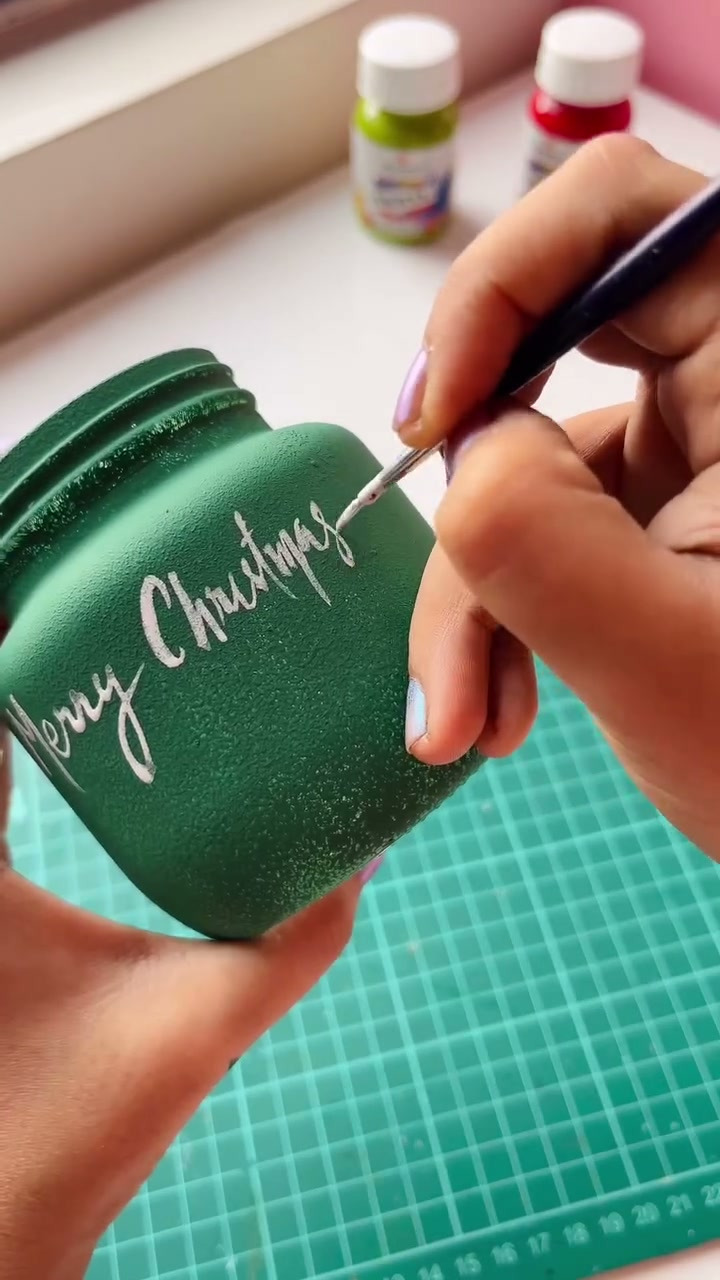
If brush lettering is not your thing, a white paint pen does the same job with far less swearing. A name works here too, which turns the jar into a place setting or a small gift.
Step 9: Fill the jar with paper shreds
Push a loose handful of shredded kraft paper into the jar until it comes up to about the middle of the window. It gives the tea light something to sit on at the right height, and the brown paper showing through the glass looks like a little nest. Tuck in a small faux flower if you like.
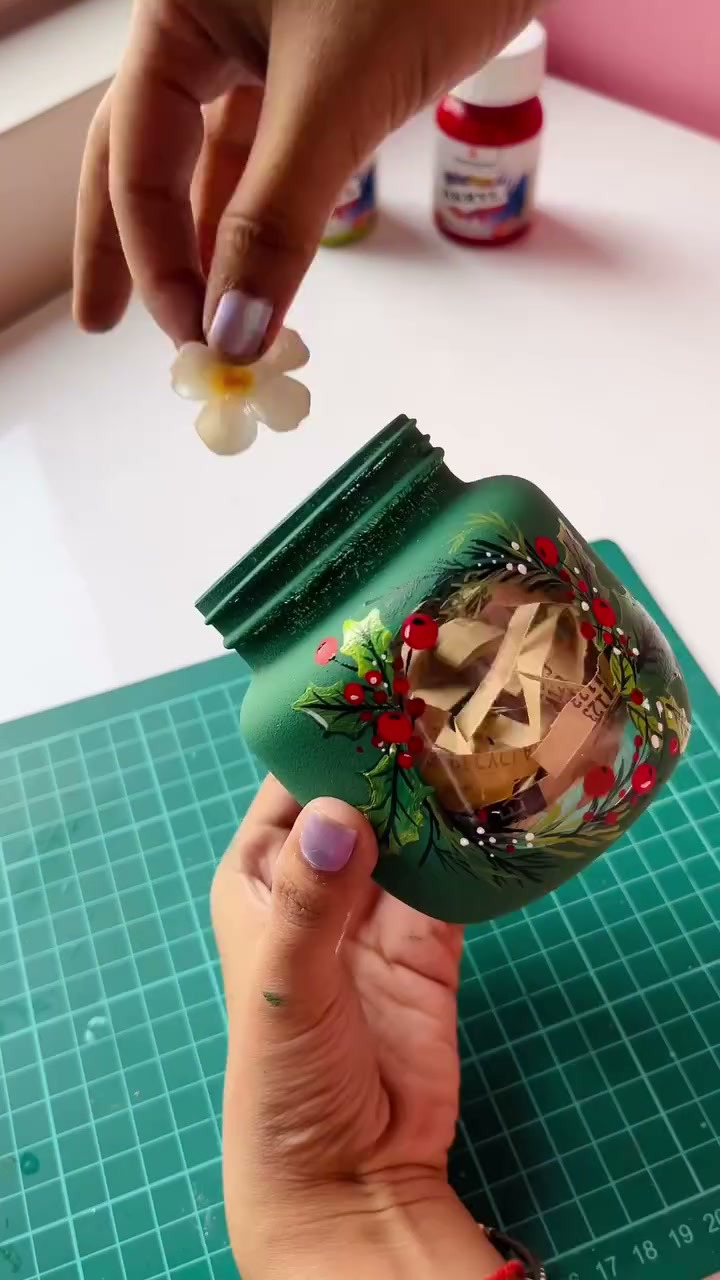
Step 10: Wrap the neck with jute twine
Run a thin line of craft glue around the screw threads and wind the twine over them, each turn tight against the last, until the threads are covered. Five or six turns is usually enough. Tuck the end under the last turn with a dot of glue and hold it for a minute.
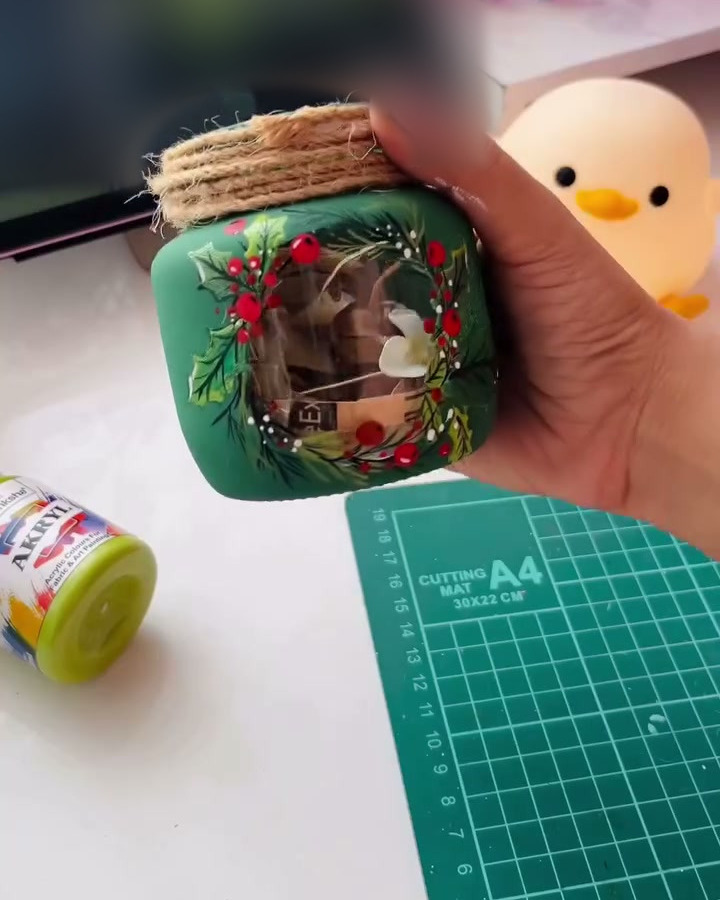
Step 11: Drop in the LED tea light
Switch the tea light on and lower it onto the paper so the flame sits in the middle of the window. Nudge the paper up or down until it lines up with the wreath.
Drying times at a glance
Acrylic dries fast on paper and slowly on glass. Most smudges on this project come from rushing one of these waits.
| After | Wait before the next step |
|---|---|
| First green coat | about 20 minutes |
| Second green coat | about 30 minutes, then peel the circle |
| Light green leaves | 10 minutes |
| Wreath finished | 15 to 20 minutes before turning the jar over |
| Lettering | 15 minutes before filling |
| Everything | a full day before the jar gets handled a lot |
These are for thin coats in a warm, dry room. In a cold or damp one, add half again.
If painting leaves makes you nervous
The window and the candle do most of the work, so a much simpler ring still looks good. Three ways to cheat:
- Dot wreath. Dip a cotton swab in light green and stamp dots around the window, then a second ring in dark green, then red dots on top. No brush control needed.
- Fingerprint leaves. Press a fingertip in green paint and print overlapping ovals round the circle. Good one to do with kids.
- Practise on the paint lid. Before you touch the jar, paint three holly leaves on something that does not matter. The second attempt is always better than the first.
What usually goes wrong
- Paint bled under the circle. The edge was not pressed down, or the sponge was too wet. Scrape the fuzzy edge back with a toothpick while the paint is still fresh, or hide it under the leaves.
- The base coat lifts when you peel. The paint went on too thick. Run the tip of a craft knife lightly around the circle first, then peel.
- Brush marks in the green. That is from wiping. Dab straight down and lift.
- Berries with a peak in the middle. Too much paint on the brush. Touch and lift, do not press.
- Paint scratches off later. The glass was greasy. Wash the jar with dish soap and wipe it with rubbing alcohol before step 1.
Keep it LED
This jar is for a flameless tea light only. The inside is packed with paper and the neck is wrapped in twine, and both burn. If you want to use a real candle, leave out the paper filling and the twine, and stand the candle on the bare glass base in a jar wide enough that the flame stays well clear of the painted sides.
The paint is on the outside, so do not put the jar in water. Wipe it with a dry cloth. A coat of clear matte acrylic sealer over the dry paint makes it tougher if it is going to be packed away and brought out every December.