Frosted Christmas Mason Jar Lantern With Stickers
Frost a jar with a sponge and white paint, add clear Christmas stickers, a cord handle and fairy lights. An easy lantern with no drawing needed.
 By Hakan
Published
Project card
- Time
- 45 minutes, plus drying
- Skill
- Beginner
- Cost
- About $10
- Jar
- Quart or half gallon
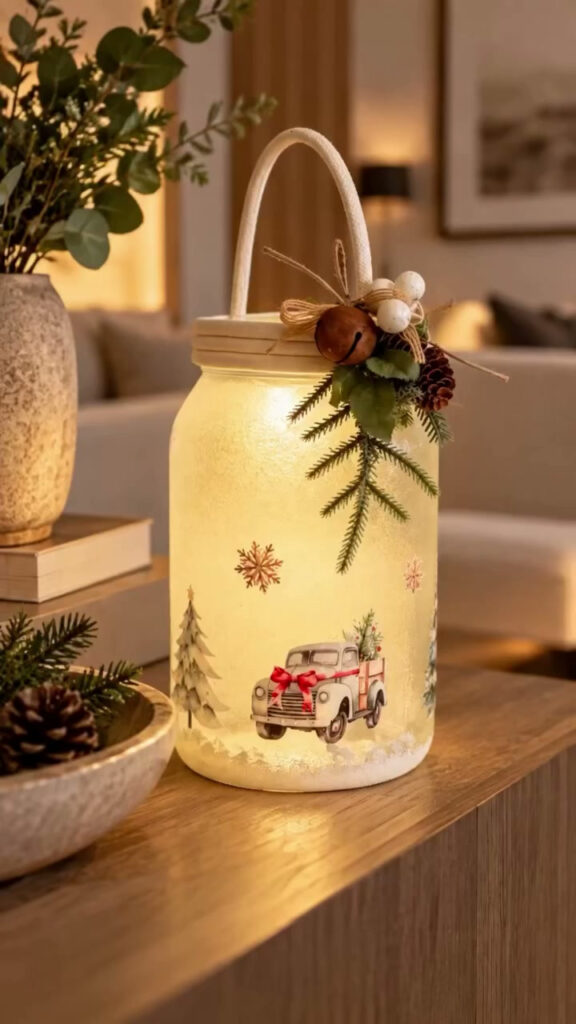
Frosted glass makes fairy lights look softer and hides the wire and the battery pack. Add a few clear Christmas stickers and a cord handle and a plain storage jar turns into a lantern for the hallway table. There is no drawing and no fine brush work in this one. If you can dab with a kitchen sponge, you are qualified.
What you need
- 1 large clear glass jar with smooth sides, quart or half gallon. No lid needed
- For the frosted coat: 3 tablespoons of white school glue (PVA), 1 tablespoon of water and half a teaspoon of white acrylic paint
- For the snow at the base: 2 tablespoons of white school glue, 2 tablespoons of baking soda and 1 teaspoon of white acrylic paint
- 2 small dishes and a spoon for mixing
- 1 ordinary kitchen sponge, cut into three pieces
- 1 sheet of clear-backed Christmas stickers, sometimes sold as “transparent” or “PET” stickers: a tree, a snowman, a truck, a few snowflakes
- Small scissors
- Thick white cotton cord, 6 to 8 mm, about 5 ft (1.5 m)
- A hot glue gun and 2 glue sticks
- A small bunch of faux greenery: one pine sprig, one pinecone, three or four white berries
- A short piece of jute twine, about 12 in (30 cm), to tie the bunch
- 1 string of battery-operated fairy lights (also sold as “copper wire string lights” or “micro LED lights”): 20 LEDs on about 6.6 ft (2 m) of thin wire, warm white, with a small battery box
Which lights to buy
Search for battery operated fairy lights or copper wire string lights. What you want is a hair-thin bendable wire with tiny LEDs along it and a small battery box at one end. Do not buy an LED strip. A strip is a flat, stiff tape that needs a plug or a USB port and is made for sticking under shelves.
- Length: 20 LEDs on 6.6 ft (2 m) for a quart jar, 50 LEDs on 16 ft (5 m) for a half gallon.
- Battery box: the flat kind that takes 2 CR2032 coin cells is the easiest to hide in a jar. The larger box for 3 AA batteries runs far longer between changes but is harder to tuck away.
- Colour: “warm white” gives a candle-like glow. “Cool white” looks blue behind glass.
- Nice to have: a timer or a remote, so you do not have to open the jar to switch it on.
Step 1: Frost the jar with a sponge
Wash the jar with dish soap and dry it well. In a small dish, stir together 3 tablespoons of white school glue, 1 tablespoon of water and half a teaspoon of white acrylic paint. The mix should look like thin cream. Dip a piece of sponge, dab most of it off on the edge of the dish, and tap it lightly all over the outside of the glass.
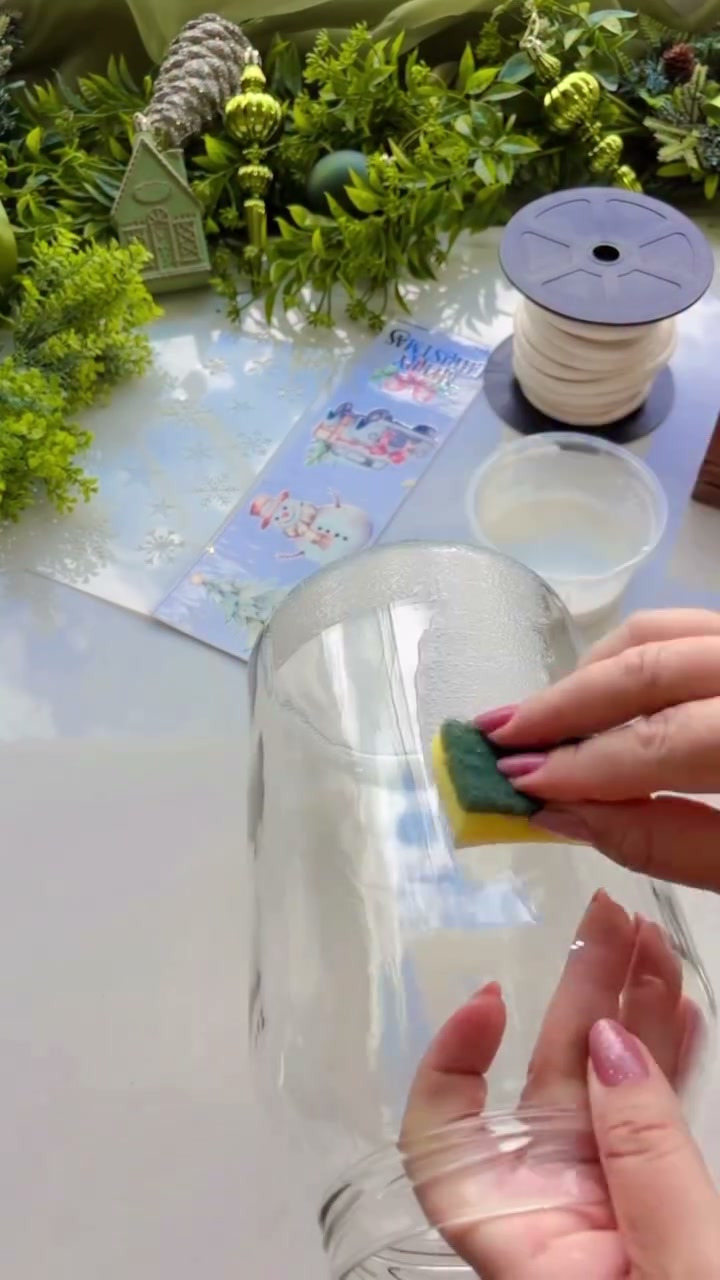
It goes on wet and bubbly and looks worse before it looks better. As the glue dries, the bubbles settle into an even matte frost that still lets light through. The glue is what makes the finish translucent. Paint alone would turn the jar solid white, which is why there is only a little of it in the mix.
Keep the sponge fairly dry and tap, never wipe. If shiny bare patches show once the first coat has dried, go over just those spots again.
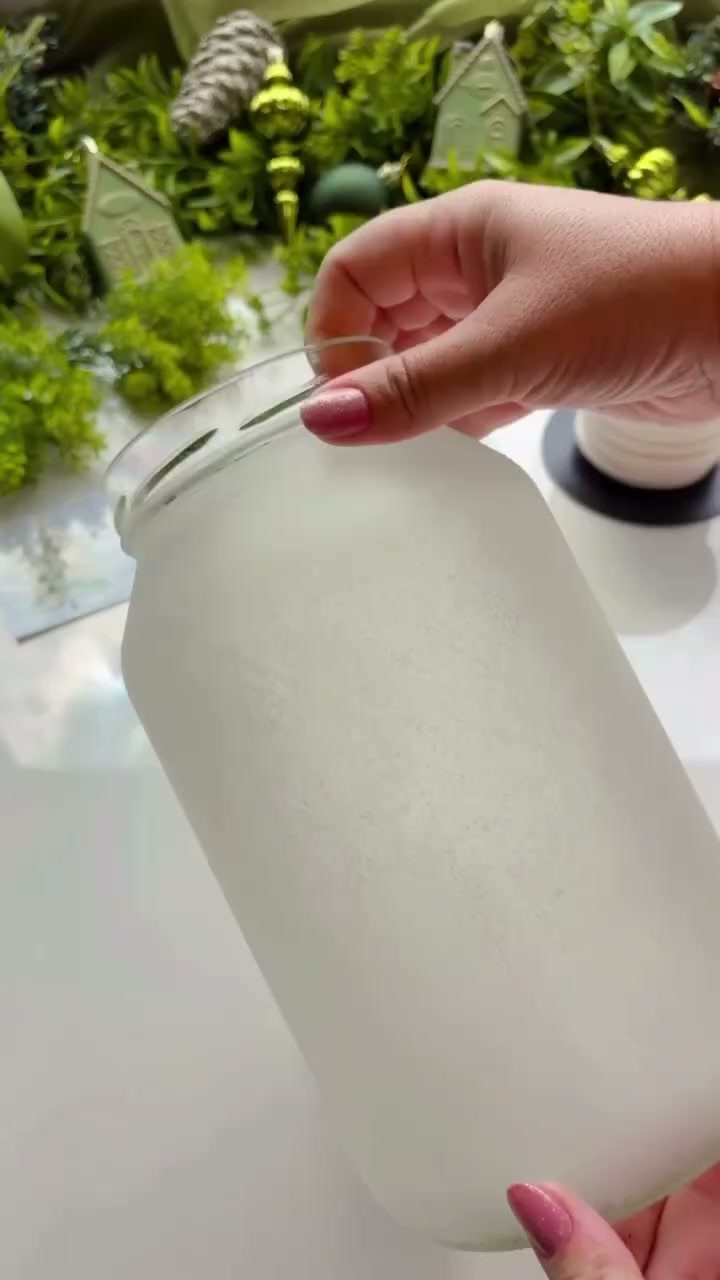
Let it dry until it is no longer tacky, about 30 to 40 minutes, before the stickers go on.
Step 2: Cut out the stickers and place them
Clear stickers work best here because the frosted glass shows through the background and only the picture stays visible. Cut loosely around each design so you can handle them one at a time.
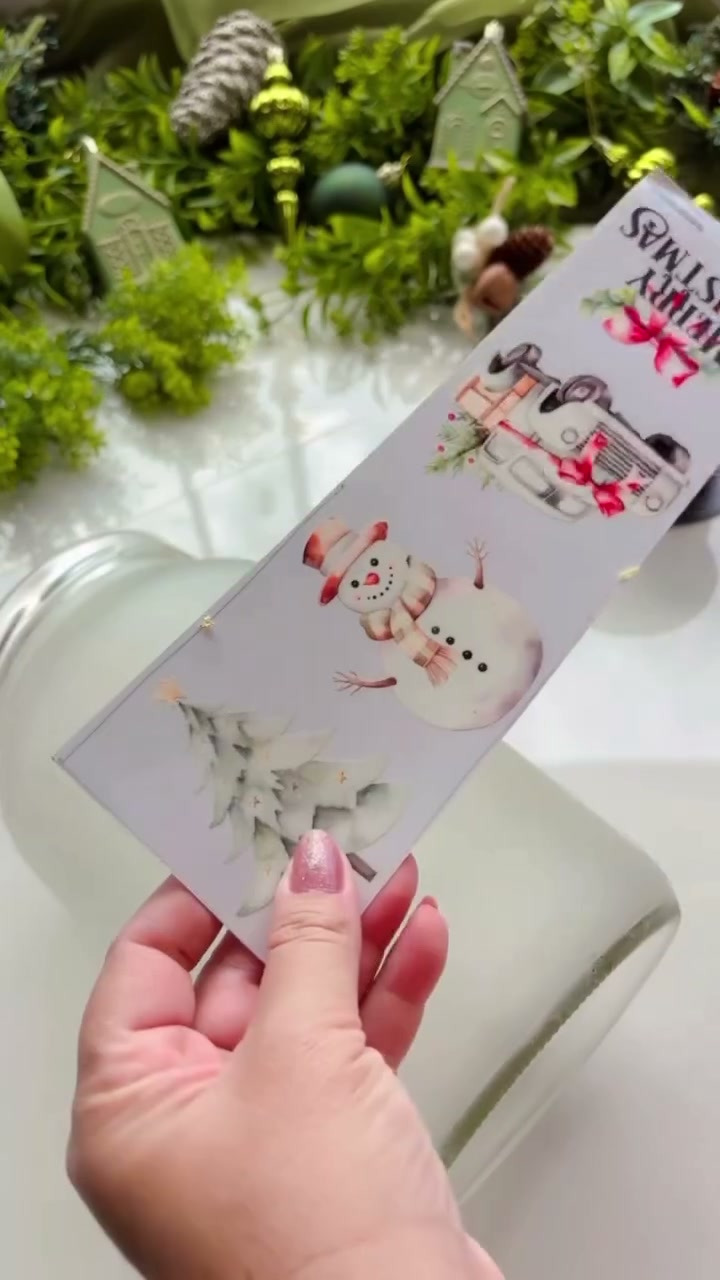
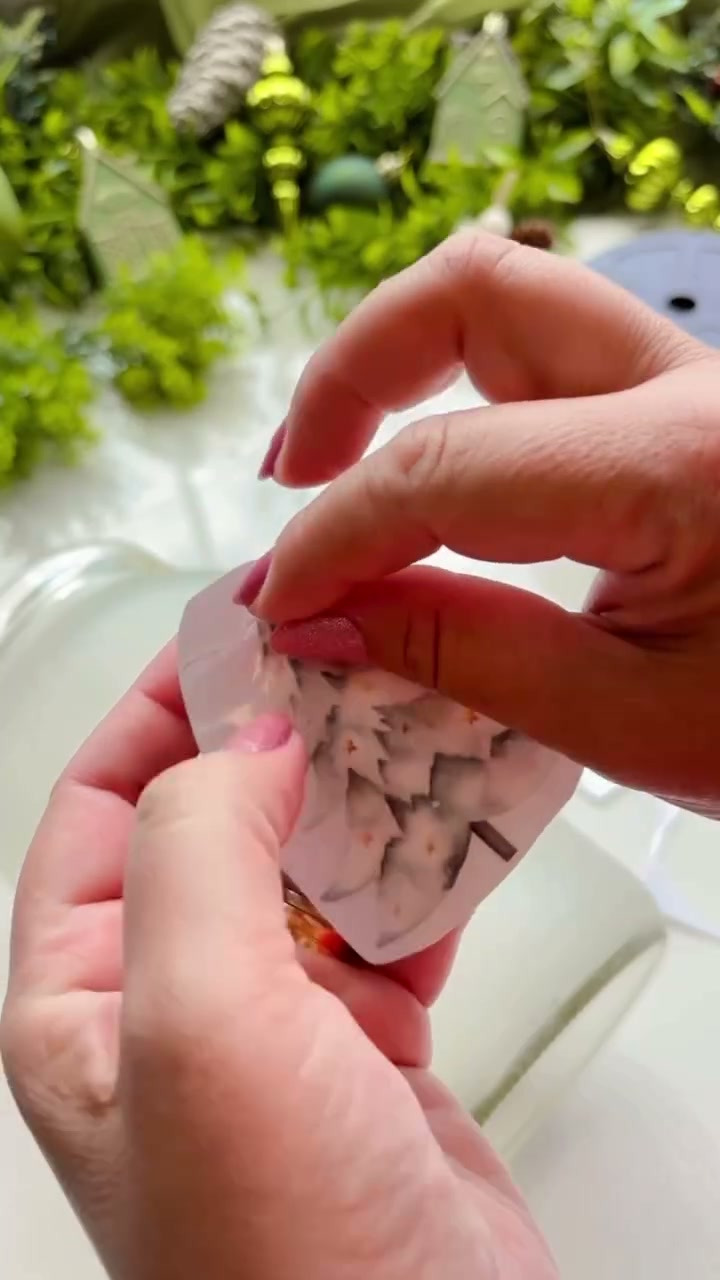
Peel off the backing and lay each sticker on the jar from the middle outwards, smoothing with a fingertip so no air gets trapped. Start with the biggest design on the front and build around it.
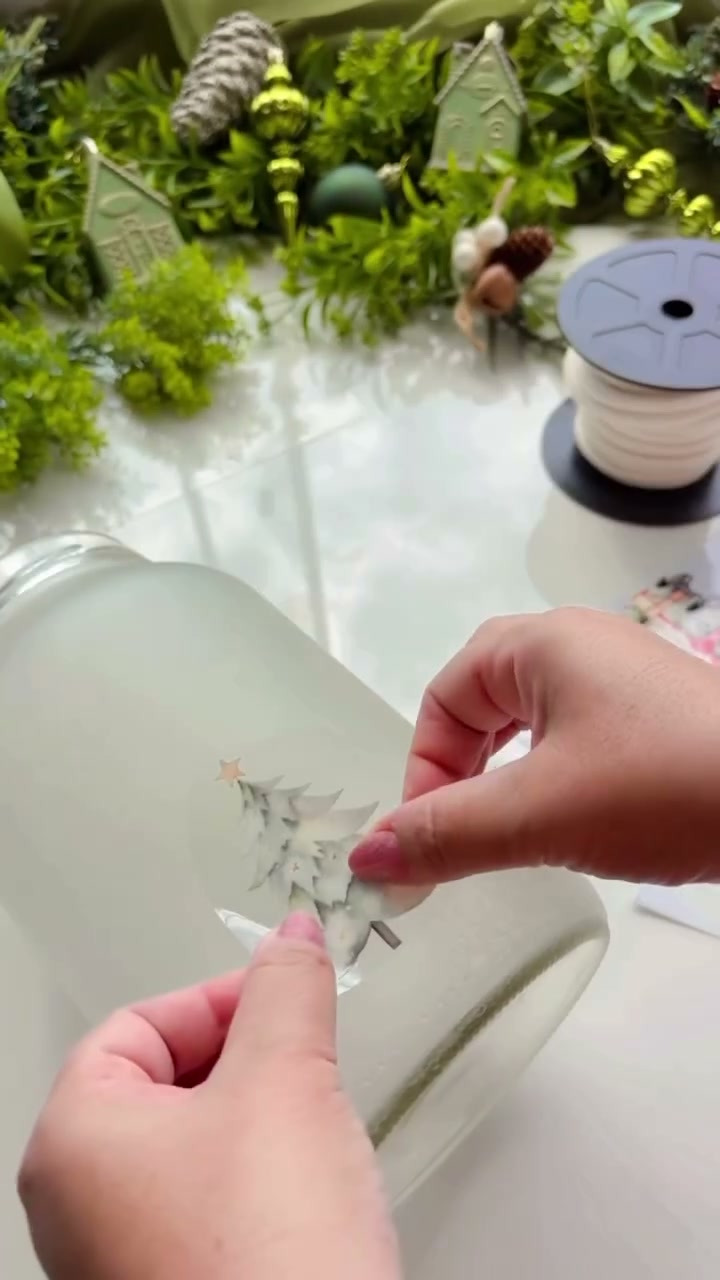
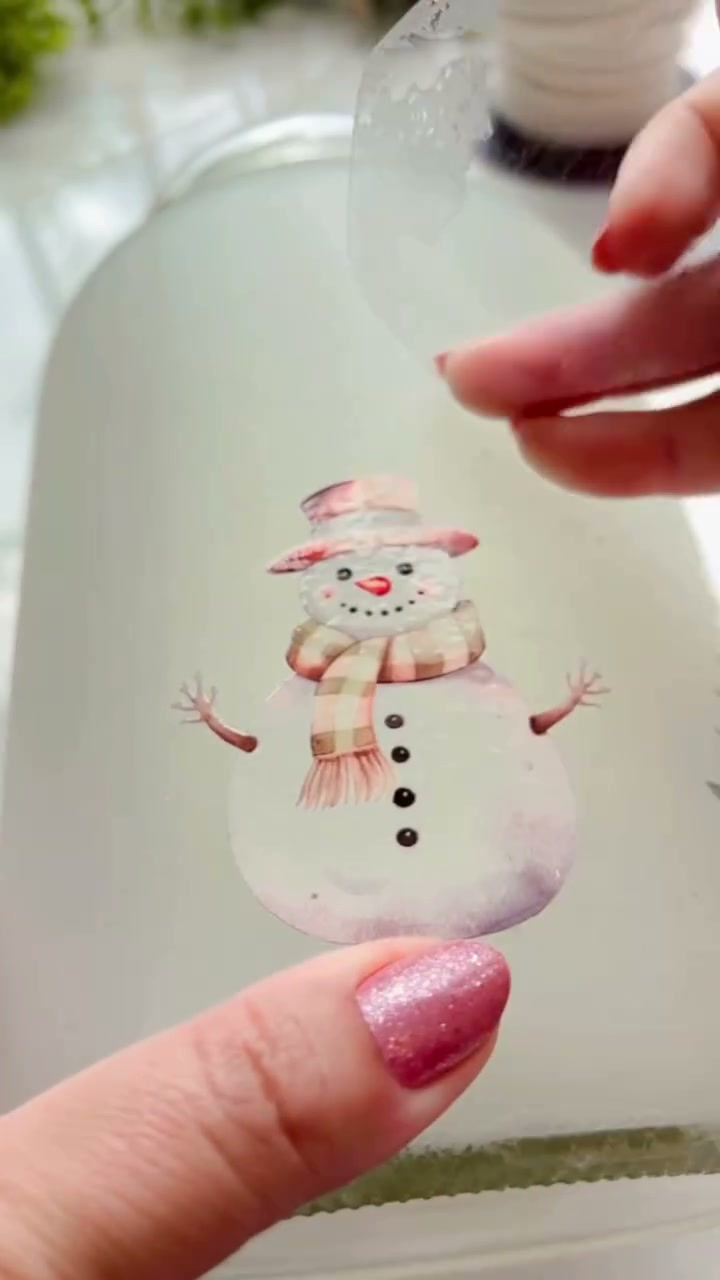
Three large designs spaced around the jar plus a handful of small snowflakes look calmer than covering every inch. Leave the top third mostly empty. The greenery goes there.
Step 3: Add the snow
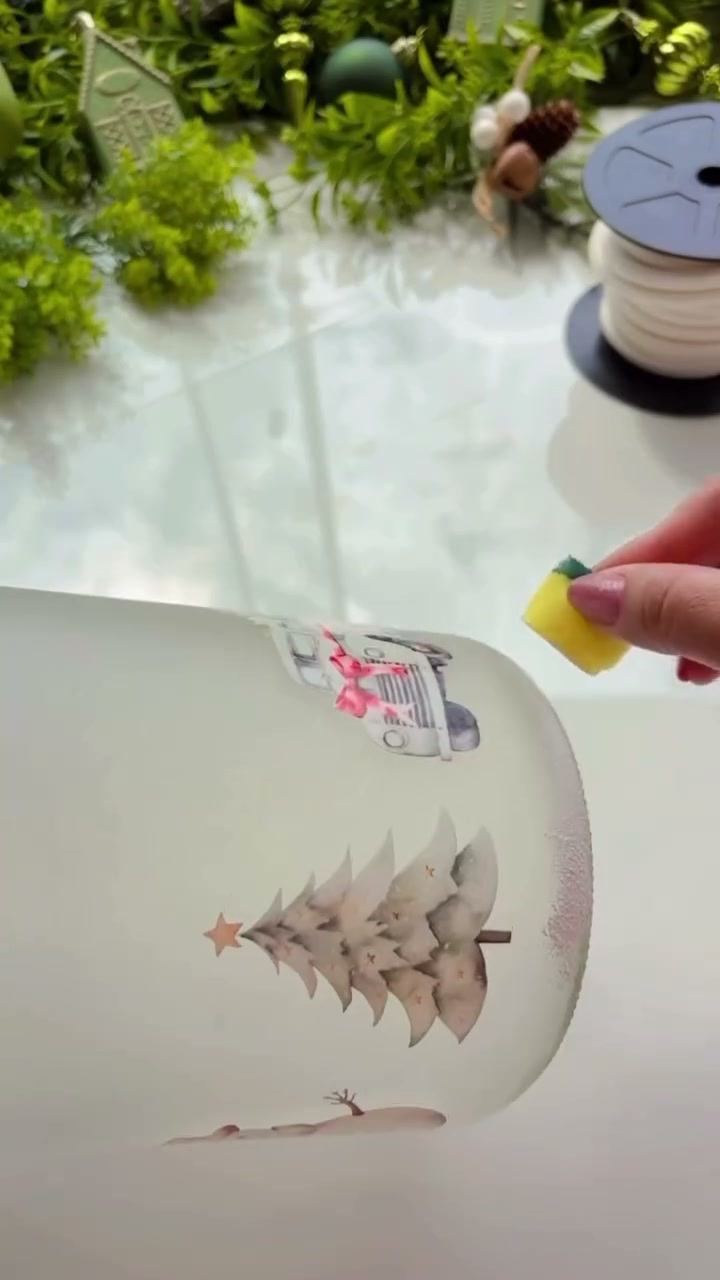
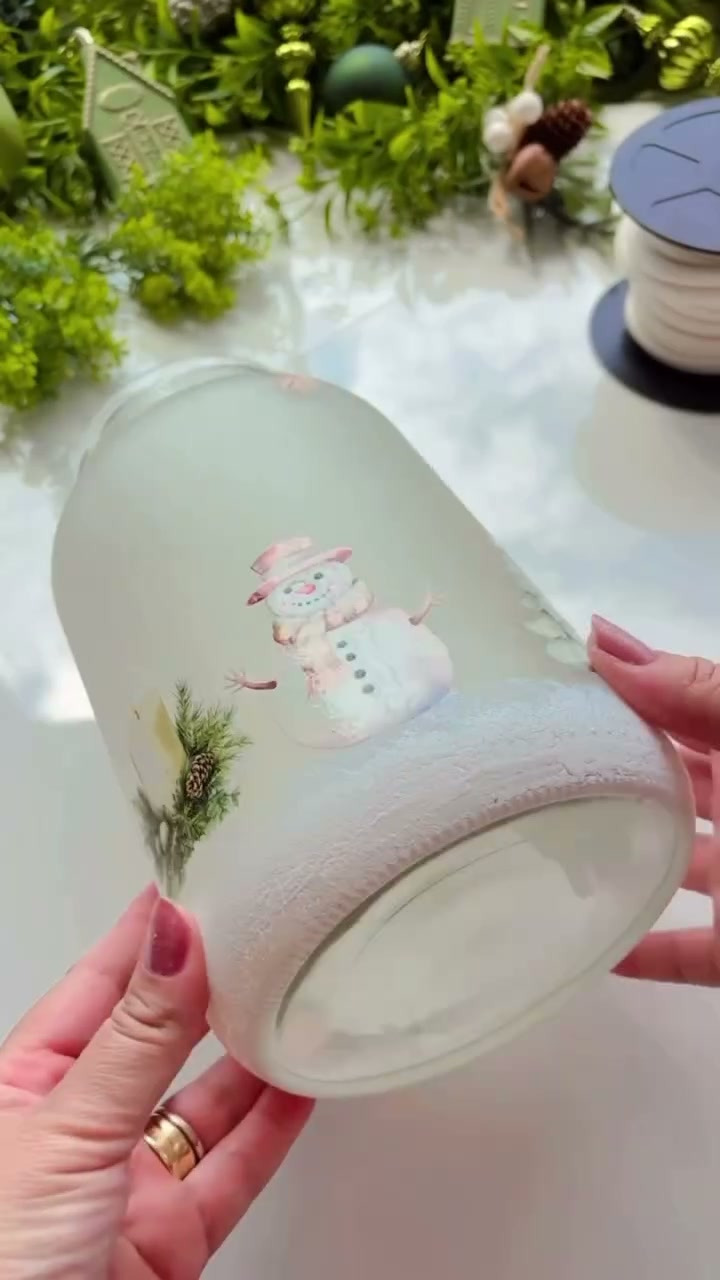
In the second dish, mix 2 tablespoons of white school glue, 2 tablespoons of baking soda and 1 teaspoon of white acrylic paint into a thick paste, about the texture of cake frosting. If it is runny, add a little more baking soda.
Pick some up on a fresh piece of sponge and dab a band of it around the bottom of the jar, like a snowdrift. Bring a little of it up under the tree and the snowman so they look as if they are standing in snow. The paste dries rough and grainy, which is exactly what snow should look like.
Step 4: Glue on the cord handle and wrap the neck
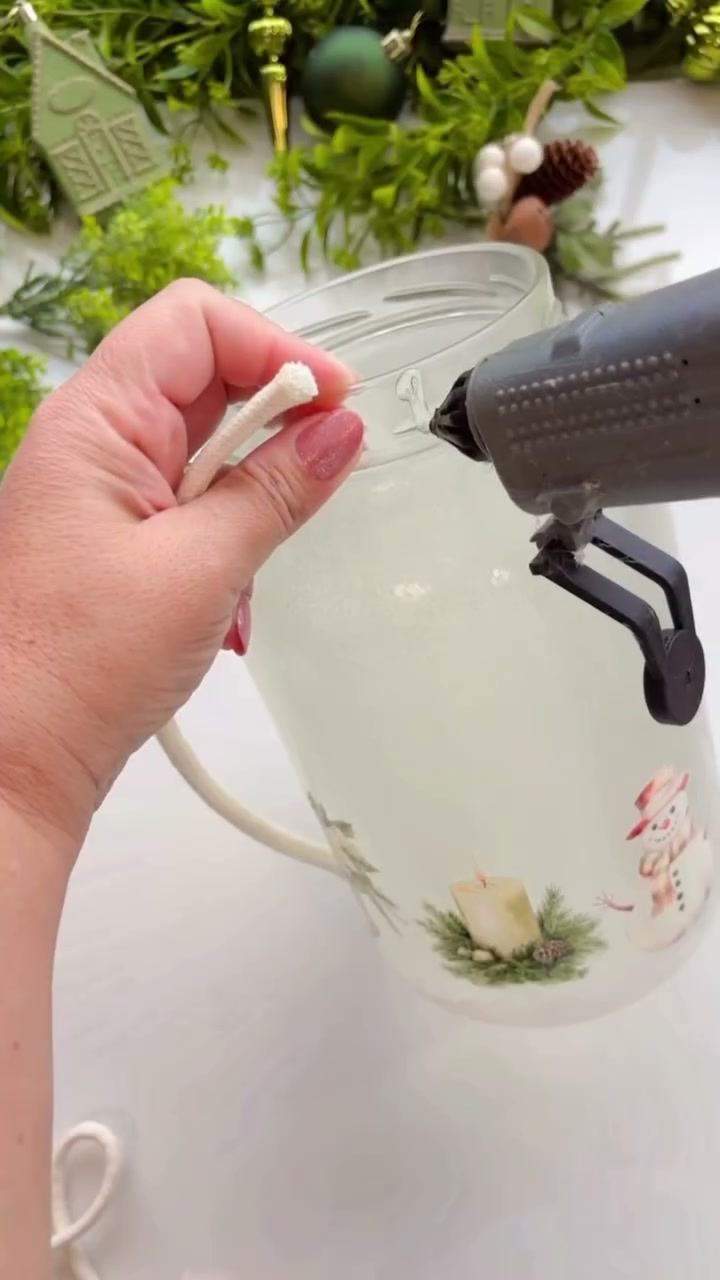
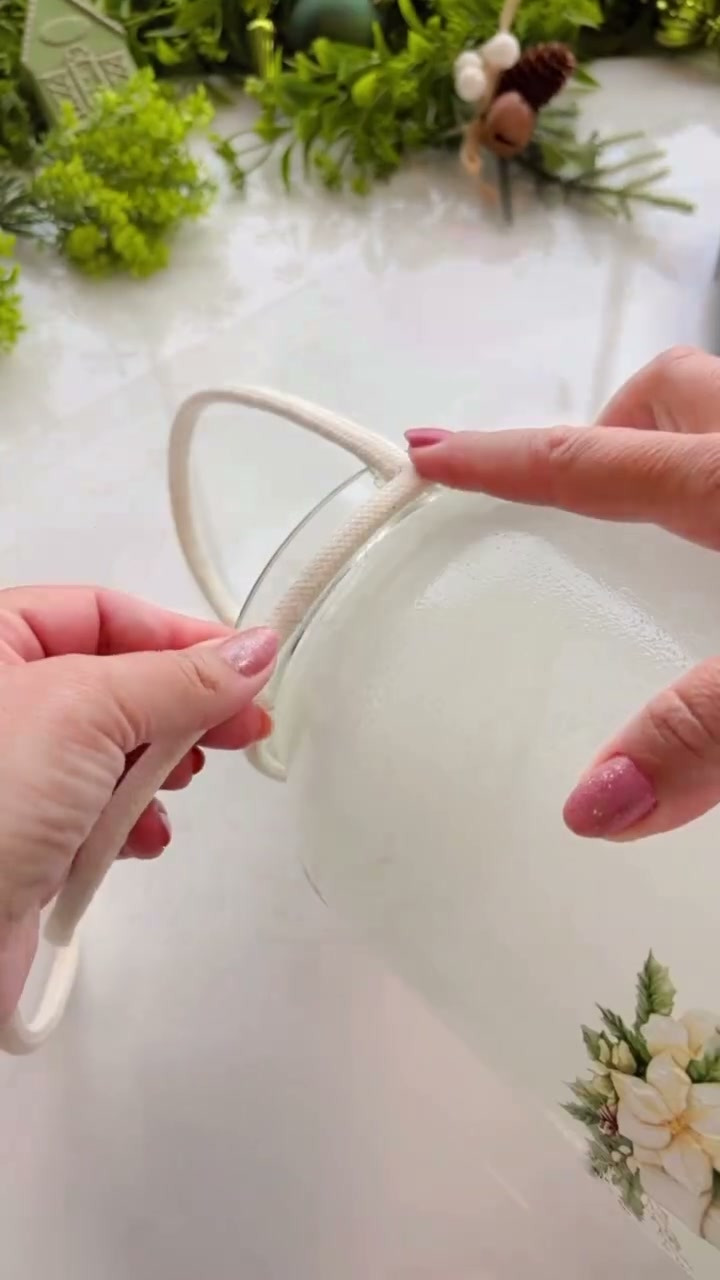
Cut a piece of cord about 16 in (40 cm) long for the handle. Glue one end to the side of the neck, just under the rim, hold it until it grips, then arch the cord over the top and glue the other end directly opposite.
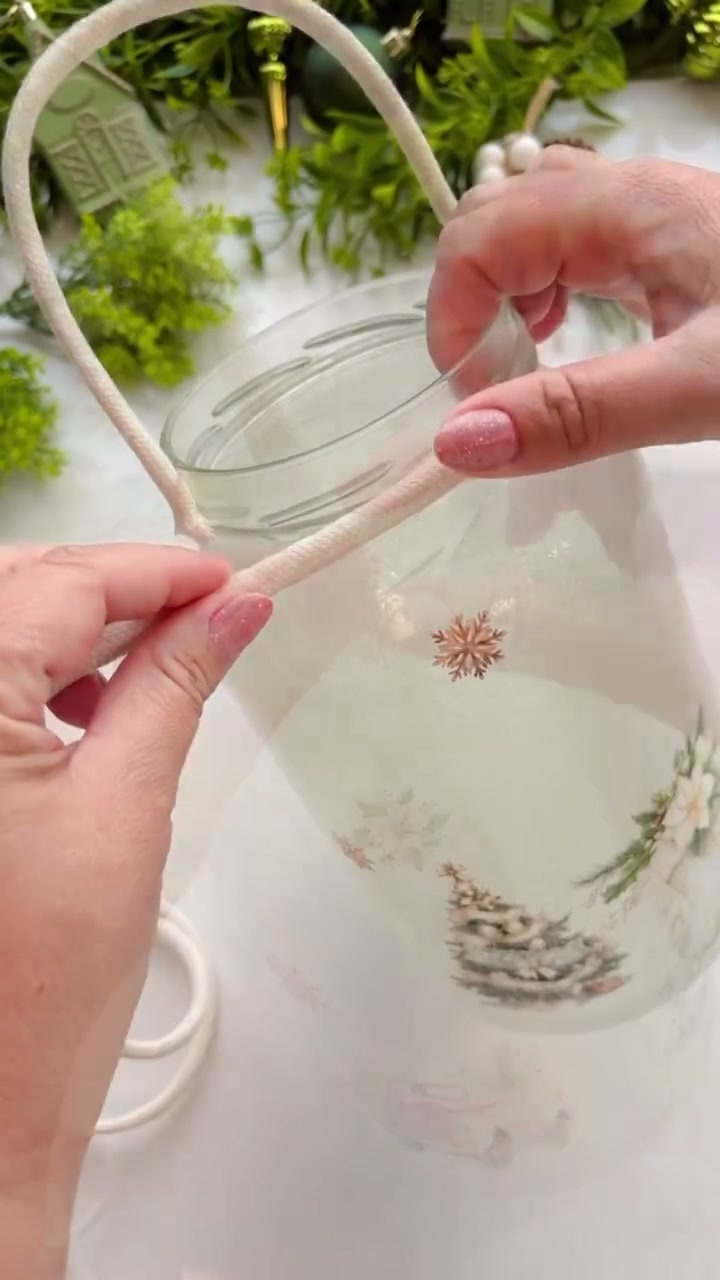
With the rest of the cord, wrap the neck of the jar two or three times, covering the two handle ends as you go. Glue the start and the finish at the back.
Step 5: Tie on the greenery and add the lights
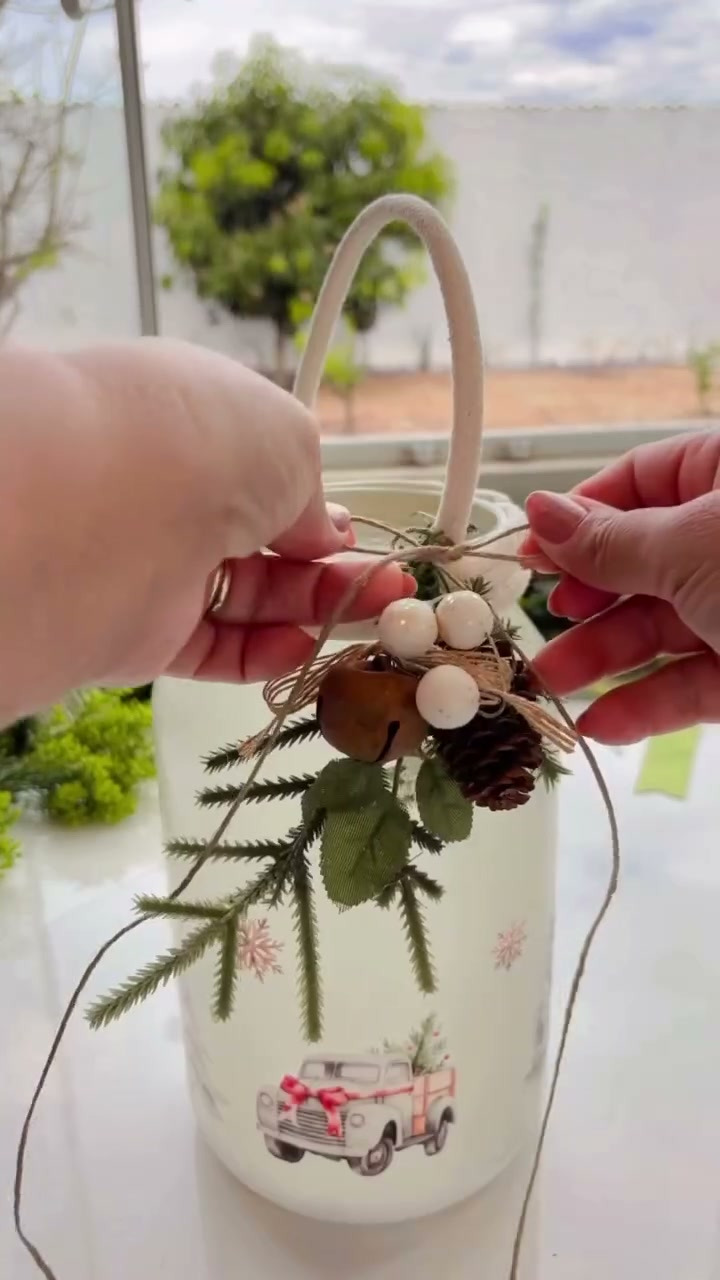
Bundle the pine sprig, the pinecone and the berries, tie them together with twine, and glue the bundle at the base of the handle on the front. Lower the fairy lights into the jar and leave the battery pack sitting on top of the loops.
Glue frost or frosting spray?
Both give a frosted jar. Which one suits you depends on what you already have at home.
| Sponged glue mix | Frosted glass spray | |
|---|---|---|
| Look | Soft and slightly textured, like snow | Smooth and even, like etched glass |
| Cost | Pennies, if you own school glue | A full can for one jar |
| Where to do it | Kitchen table | Outdoors or by an open window |
| Fixing mistakes | Wipe off with a damp cloth while wet | Hard to remove once dry |
For a snowy Christmas jar the sponge wins, because the uneven texture is part of the charm.
What usually goes wrong
- The jar looks painted, not frosted. Too much white paint in the mix, or too thick a coat. Wipe it back with a damp cloth before it dries and start again with a drier sponge.
- The snow paste cracks or falls off. Too much baking soda, or it was put on in a thick lump. Dab it on in two thin layers.
- Sticker edges show as shiny rectangles. The stickers were left as squares. Trim close to the picture.
- Stickers lift at the edges. The frost under them was still damp. Press them down again once everything is dry, or seal the whole jar with a coat of clear matte varnish.
- The handle pulls off. Hot glue on bare glass has a weak grip. The wrapped cord over the ends is what holds them, so wrap tightly.
Looking after it
Use LED lights only and switch them off overnight. Do not carry a heavy jar by the cord handle. To clean it, dust it with a dry cloth. Water will take the frost, the snow and the stickers off, which is also good news: in January you can soak everything away and have a clean jar again.